Why Build Your Own Workbench
A solid workbench is the heart of any workshop. Commercial options are either expensive or flimsy. Building your own lets you customize the dimensions, add the features you need, and create something that will last decades. This workbench design is rock-solid, uses affordable construction lumber, and can be built in a weekend with basic tools.

Materials List
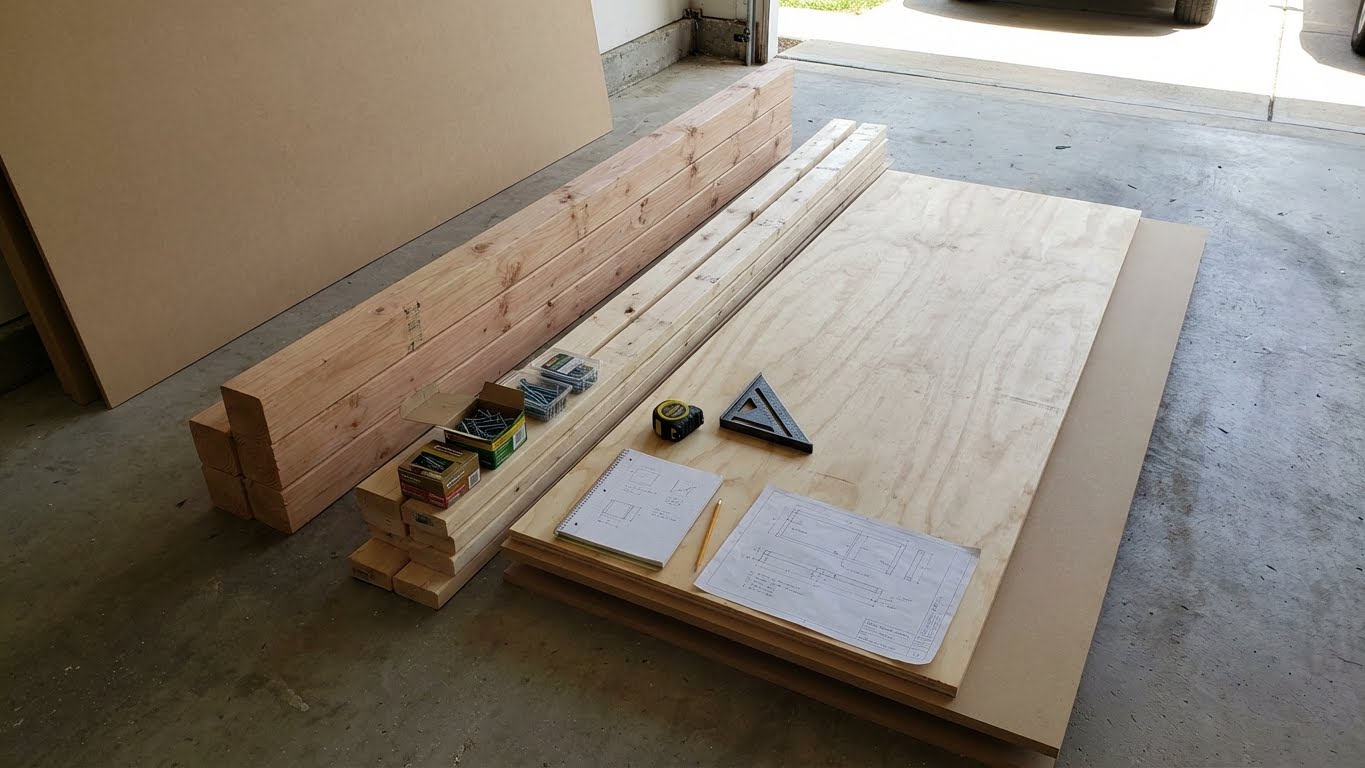
The frame uses 4x4 posts for legs and 2x4 lumber for rails and supports. The top consists of two layers - a base of 3/4-inch plywood topped with 3/4-inch MDF for a smooth, replaceable work surface. You'll need about 20 feet of 4x4, 50 feet of 2x4, one sheet each of plywood and MDF, 3-inch and 2.5-inch construction screws, and wood glue. Optional: casters for mobility, a woodworking vise, and drawer slides for storage.
Construction Steps
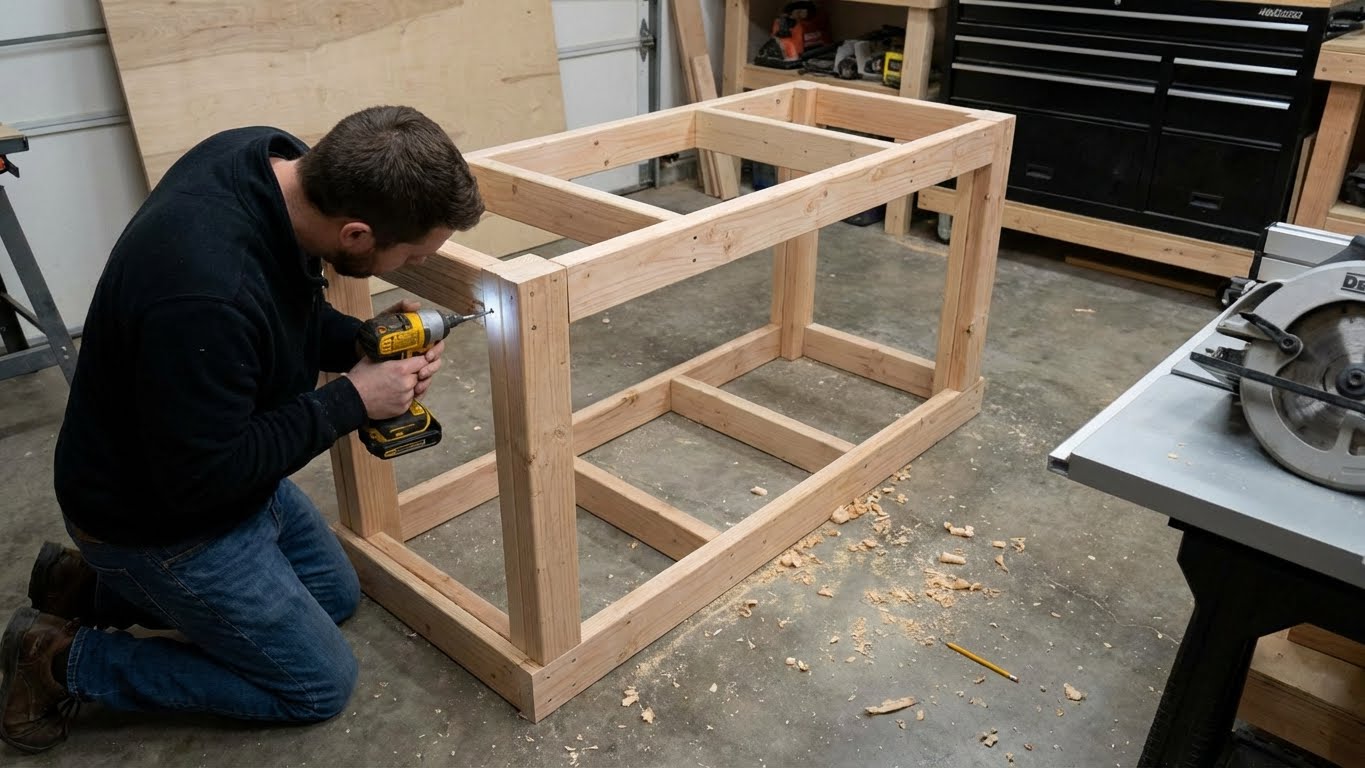
Cut four 4x4 legs to 34 inches (adjust for your height - workbench should be at wrist level when standing). Build two end frames by attaching 2x4 rails to legs with pocket screws or lag bolts. Connect end frames with long 2x4 stretchers at top and bottom. Add a shelf at the bottom for heavy tool storage. Cut plywood top to size (24x60 inches is a good standard size), attach from below with screws. Top with MDF using construction adhesive. Sand edges and apply a protective finish if desired. Add optional features: a power strip, pegboard back, LED lighting, or built-in tool storage.